How to Produce a Superior Trade Show Video

A common misconception is that any video – whether it is a short corporate promo, an installation piece or a product knowledge clip shot on a smart phone – is perfect fodder for trade show viewing.

In reality, a properly produced trade show video is really its own animal and needs to be approached as such. Elements of existing videos can certainly be incorporated into a new trade show video production – but not relied upon to do the job by themselves. Here are 5 good rules to live by:

#1 Production Quality

In this day and age, any video should be in HD and crisply and professionally produced. (For tips on affordable, high-quality video production check out How to Concept and Executive Produce a Short, Effective Video Production.)

Since most trade show booth video monitors tend to be on the larger side (32” and up) this is particularly important. Due to the massive proliferation of hi-quality consumer HD video and audio equipment, audiences are getting more and more sophisticated. (A properly used smartphone can shoot damn fine HD video in the right lighting and conditions.) People are accustomed to viewing hi-quality video pretty much everywhere – your booth should be no exception.


#2 Length and Structure

Since trade show booth videos are typically played/repeated all day throughout the show, a 1-2 minute video generally doesn’t make sense – as it will pretty much drive everyone nuts in short order – show attendees and booth staff alike. Most attendees are at a show to learn more about a service or product and are willing to spend some time doing so.

Conversely, a 15 minute training video is much too long and detailed for trade show use. In our experience, 5 to7 minutes is the sweet spot for the majority of booth/product applications.


#3 Think Infomercial:
Much like trade show videos, infomercials are often repeated over and over so they are worth examining. Let’s briefly look at the structure of a typical infomercial. Usually an infomercial begins with an upbeat (or dramatic) “commercial” that hits all the key points of the product or service. Then it stretches out with more detailed information and demonstrations. Then the cycle repeats: commercial – detailed information, commercial – detailed information, etc. Maybe there are a few customer testimonials thrown in randomly as well.

The point here is that the style and pace of infomercials changes up frequently – instead of repeating one video segment over and over until it becomes a droning buzz in the background that people tune out…or turn off.

An Example:

Let’s say you sell racing go-karts and want to produce a trade show video. A basic format would be as follows:

  • The first minute or two can be a voiced-over “commercial” – that quickly focuses on the company and models of go-karts provided
  • Cut to a minute or two of racing shots of the go-karts set to music – with no narration or voice over – just music
  • Have the voice over return and cover go-kart features and benefits. Then cut to a customer testimonial or two
  • Repeat more go-karts in action set to music

You get the idea. The main point is to change up the style and pace to better hold viewer interest. Of course, in the “music video” portions you can also fly-in copy points or logos as needed to help reinforce your message or brand.

#4 Voice Over and Music

Trade shows can often be very noisy environments, and narration from video playback in a booth can add to uncomfortable noise levels and/or not be heard properly.

If trade shows or conferences where you exhibit tend to get really loud, you may want to consider ditching the voice over format in favor of a music video format where footage, text and graphics are cut to an instrumental music track appropriate to your industry and company.

The challenge when taking the music video route is communicating your message, business philosophy or brand with on-screen text and graphics. The up-side is that if you do it right and your visual content and text points are solid, a music video is a powerful and effective way to communicate – even without the benefit of a voice over.

Conversely, if your booth is large and perhaps has a separate conference area for meetings with interested attendees, a video with a voice over is preferred as it is a more “formal” sales setting. In a perfect scenario, your prospect would have been drawn in by the informative and fast moving music video playing at the front of the booth!


#5 The “No Sound” Test

One more tip and we are wrapped-up. A good test for almost any trade show video is as follows: turn the sound all the way down and watch the video. Does it still communicate effectively, a little bit or at all? If it still communicates clearly without sound, it’s a winner. Hands down.

So how do you present your finished trade show video? Check out How to Effectively Deploy Your Finished Video Production, where we touch upon the best practices and hardware for playing a video in a trade show booth or environment.

If you are looking for “winning” trade show videos, Total Spectrum is your production company. We have the in-house staff, equipment and experience to make it happen in time for your next trade show. Contact us at 714.637.3600 and speak to one of our experts today.

De-mystified: What to Expect When Making a Professionally Produced Corporate Video

Short videos for websites, tradeshows, eBlast campaigns, social media and other delivery platforms are becoming larger portions of the marketing pie – exponentially, in some industries. So this article isn’t about the need for video – or how to do it yourself on your smartphone or GoPro.

Instead, we are going to cover the professional video production process from nose to tail – so when you do decide to produce a high-quality custom video you will know exactly how to proceed and what to expect.

Where do you begin?

This is often the biggest stumbling block and it’s the first step. It’s what seems to mystify the most. So where to begin? The first step before approaching a production company or agency for a proposal is to determine how long a video you need, and the range of your budget. Attention spans are getting shorter, so brevity is paramount. A good target length is two minutes – three minutes on the outside. 90 seconds would be even better.

If it’s a complicated subject, think of producing multiple short video “modules” instead of a 15-minute snooze-fest. Recent studies have shown that the most effective length for videos on platforms like Facebook and Instagram is from 6 to 30 seconds! That’s not a typo…6 seconds!

What do you like?

Next, find and bookmark a few videos on YouTube or Vimeo that you like or would like to emulate. They don’t even have to be related to your industry. Then write up a detailed outline of what topics you would like to cover – keeping in mind more than 3-5 major topics or points in a short video becomes an unwieldy mess.

A simple breakdown or outline of a video could look like this:

  • Logo or title sequence with music swell (5-10 seconds)
  • Introduction to the company, service or product (15-30 seconds)
  • Key Point #1 (20-30 seconds)
  • Key Point #2 (20-30 seconds)
  • Key Point #3 (20-30 seconds)
  • Summary or Call to Action (30 seconds)
  • Final screen: web URL / Phone #, etc. (10 seconds)

As far as total running time is concerned, research has shown that for marketing videos you are generally better off shooting for the shorter end of the spectrum.

What does it cost?

As far as budgets are concerned, prices from production companies vary wildly but plan on spending at least $3,000 to $5,000 for a broadcast-quality finished product in HD or $4K with a moderate amount of bells and whistles. Three finished minutes of custom video for $5,000 is a good rule of thumb – depending on location, crew needs and the number of shoot days.

We realize that’s a healthy chunk of change. That’s because when all is said and done – from scripting to delivery of the final video – there are at least a few dozen hours of time invested – and significant outside costs for voice over professionals, music licensing and possibly other special services.

The value? Not only will a professionally produced video best represent your brand, but a strategically conceived video production can be deployed /repurposed on a variety of platforms, including websites, tradeshows, sales presentations/meetings YouTube, social media, eBlast campaigns and more.

How does the production process work?

The next big question to de-mystify. Let’s break it down into three key areas:

The Script

Generally, the video production people will take the outline you provided and flesh it out into a script for the voice over or on-camera talent. The script will most likely go back and forth a couple of times for approvals, revisions or tweaks. From there the script gets recorded by a professional narrator or on-camera host.

Note: It’s very important to really nail down the exact script verbiage because it gets expensive to make changes after everything has been recorded and edited. Trust us on this; it’s pure experience and wisdom.

The Shoot

Unless it is a complete 2D or 3D graphics production, there needs to be “video for the video”. Most short marketing or company overview videos are shot on location over the course of 1-2 days at a corporate office, plant, construction site or wherever the desired activity is taking place. It’s always good to get a few shots of every job or process for plenty of variety. Wide, establishing shots of the offices, lobbies or facilities are always a must.

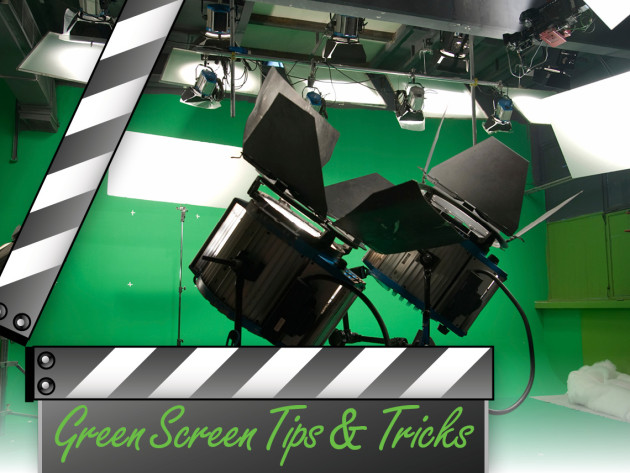
A super-effective and flexible video production tool is green screen technology – where you can have the host of a video appear in multiple locations without the need for travel. With modern keying technology, equipment and techniques it can look very crisp and realistic, and can add another dimension to your project.

The Editing

So you have your script written, your narration recorded and your raw footage in the can…it’s editing time, people! There are two approaches: Let the video editor take all the assets and come up with a first cut for your review and revision, or sit with him or her the whole time.

Unless it is very technical subject matter, I strongly discourage the latter approach as it invariably takes way more time and having someone sit there often drives the editor nuts. Just the way it is. Some editors may want you to hold their hand the whole time, but that’s not who you need. A professional should drive the process at this point – with input from the producer as needed. Like the script, there will be a couple of rounds of back and forth, and then it’s a done deal!

How long will it take?

Video production time frames vary depending on scheduling, availability, script and video draft approvals and a number of other variables – some often unseen. That said, in a reasonable world the whole process should take about a month. Basically, a week each for scripting, shooting, editing and revisions/approval is a good rule of thumb. However, sometimes scripts or video draft approvals get hung up in corporate, legal or both for weeks at a time.

Naturally, time frames can be compressed – but that can often result in higher fees. Plan on a month or so for the process to unfold (if you can) and help keep everyone involved sane.

What formats are best for the final video?

Finished videos should be delivered in a few different formats. First and foremost, a full-resolution HD mp4 file that can be used for both uploads to YouTube and played from a computer or USB drive connected to a large screen TV; an HD Windows Media version for older PC media players that don’t play mp4s and a physical DVD – either standard or Blu-Ray. 

Of course, every project is different, but these basics apply to the vast majority of short video productions. If you need a proposal for a project or want more information about any type of video production, contact Total Spectrum at 714.637.3600 and ask for Mark. (He is hell on wheels when he is half-drunk at the editing bay.)

How to produce an effective video …without footage

Posted by Mark on June 29, 2017

Chances are you are reading this article because of its contradictory title. Maybe you are thinking “no way, this is pure clickbait. How can a video be produced without footage?” You may be thinking “Its animation!” Nope. Animation is a really expensive option, even in 2D. And 3D animation can quickly decimate the heartiest of budgets.

So I will take the concept one step further: How about producing an effective 2-3 minute product, company profile or training video without footage – on a reasonable budget. By reasonable I mean somewhere in the 3.5K to 5K range – which isn’t peanuts, but since the video can be utilized over multiple platforms such as website, blog, eblasts, YouTube channel, trade show booth and more the value is tremendous.

First, the Perfect Scenario

I write this all with a bit of trepidation, because creating a video without footage – but instead with a “Toolkit” of assets and sources I will get into shortly – is not the preferred way to go. In fact, it can be quite a pain and strain on the brain. So humor me and let me describe an ideal situation for producing a video. Or skip down to the chase…your call.

Let’s say we are producing a trade show loop for a company that manufactures “X” brand of car accessories. They have a lot of state-of-the-art manufacturing equipment and processes they want to showcase in the video. My dream scenario:

  • The manufacturing facility is clean, well-lit and up to all codes and standards
  • The workforce is reasonably diverse and wearing fresh clothes or uniforms
  • It’s a sunny day outside – with the sun in the right position to facilitate a nice exterior shot of the building
  • The various machines and processes are humming along nicely for as long I need to shoot video of them
  • Finished product is shipping out the back door – always nice to shoot
  • I get finished early, beat traffic and start happy hour at 4pm sharp
  • The client provides hi-resolution, professionally-shot application photos to incorporate in the final video – as well as hi-res version of their company logo.

The Reality

To put in poker terms, if all the above elements fall into place it’s pretty much at least a Straight Flush – possibly a Royal Flush.

But as in poker, hands like that in the video production business are few and far between. The reality is that sometimes as far as assets and video resources are concerned you end up with two Jokers, along with a 3, 7 and maybe a Jack. Usually it’s somewhere between those two extremes.

This could be for a number of reasons – some possibly beyond anyone’s control. Perhaps the client’s product or service is more conceptual and isn’t something that can be shot with a video camera. Maybe the product is made overseas. Maybe they are a young company and their only application photos were quick smartphone shots done by sales people in the field that are photography challenged…even with smartphones. Maybe the manufacturing process is messy/dirty and doesn’t lend itself to impressive video.

For these reasons and others I have been called upon numerous times throughout the course of my 30 year career to PRODUCE EFFECTIVE VIDEOS WITHOUT FOOTAGE.

Here are my secrets. Let’s assume the client has given me very few assets to work with. Close to Zero.

The “No Footage” Video Tool Kit

Script

Here is how it works. Every video needs a script. The first step is to obtain the necessary information about the product or service and develop a script for the video that will eventually be narrated. In most cases I glean the info I need from company brochures and websites.

Should you write the video script yourself? Maybe, but probably not. You are better off coming up with an outline and letting someone like me write it. Or a freelance writer. Use the power of Google, for Pete’s Sake!

Professional Narration

For the video voice over, you need to hire a seasoned pro. Since we are essentially “creatively winging” the footage aspect of the production, there is no excuse for the voice over to be anything less than stellar. Don’t even think about narrating the script yourself in the bathroom into the audio app in your smartphone and sending it to the video editor. (He or she will hate you.)

Animated Video Backgrounds

High-quality animated video backgrounds used behind onscreen text and images add visual interest and can be acquired at low cost from numerous places on the web. Some are even free. A trick of mine is to convert a color animated background to black and white in post-production, add a bit of blur if appropriate, and then apply the company’s corporate color to the animated background. Voila – I have essentially created a custom animated background to use in the video as needed.

Titles & Text

For the best communication, the appropriate amount of well-placed titles and on-screen text are crucial in any video. Again, to increase visual interest, it’s usually good to add some subtle motion and or fades to the text – or have text bullet points progressively appear.

Think of producing this type of video as a layering process. You start with your voice over as your foundation. The next layers are the animated background, then text layers, and finally other images and graphics as needed. It’s kind of like a pizza.

Foraged Client Assets

In my world, any graphics, photos, charts or video clips I can lift from a client’s website or company literature are fair game. If it’s there, I will find it and use it. If the resolution isn’t HD, I can place it in a frame as an inset over the animated background with a bit of descriptive text off to the side.

Here are a couple short clips that illustrate how the elements we have discussed so far come together. (The door graphic in the video was pulled from the client’s website and modified for use in this video.)

Stock Photography – ala Ken Burns

The availability of high resolution, affordable stock photography has exploded over the last several years. There are hundreds of millions of quality images available. I am consistently amazed at what I find that works perfectly for our clients’ videos.

Stock photos can be used as insets, with text or bullet points off to one side or below – similar to a PowerPoint look, but with motion elements discussed earlier. Stock photos can also be full screen with pans, zooms, or motion effects applied – a style popularized by famed PBS documentary director Ken Burns. If it works for Ken, it will work for any production.

Once I was tasked to produce a “high energy music video” to introduce a line of door locks and handles. Since the product was new, there were no installations, so there were no application shots. All I had were glamour shots of the hardware. Great.

The solution: I incorporated numerous background shots of the types of buildings and offices the hardware would be soon installed in. Done deal. You can check out a sample of it here:

Stock Video Footage

OK, I fibbed a little. Some “no footage” videos do have a bit of video footage. Like stock photography, stock video footage services have really come a long way, so I use a clip or two here and there if appropriate. You can run into some cost issues, because it can get expensive. One stock video clip generally costs as much as 4-5 stock photos. If it’s a shot of a building, a mountain or scenery you are better off using a still shot and adding a bit of motion in post-production.

Here is a video sample that combines stock footage, stock photography, on-screen text and product shots:

For the record, on a few occasions where cost was not an object, I have produced entire videos from stock video footage:

“Poor Mans” 2D Animation

This technique combines graphic arts, Photoshop skills and video editing knowledge – the trifecta. I’m not a graphics guy, but I’m solid in Photoshop and a black belt in Adobe Premiere video editing software. So, for me this technique is usually a team effort.

Basically, multiple Photoshop layers are manipulated in the video editing software with various effects to create a simple “animation” of a process or concept. It’s way more cost-effective than a standard frame by frame animation, and can be done fairly quickly.

The Infographic

The infographic is an art form into itself that combines graphic, text and 2D animated elements to effectively tell a story. The Wikipedia definition spells it out perfectly: “Infographics are graphic visual representations of information, data or knowledge intended to present information quickly and clearly. They can improve cognition by utilizing graphics to enhance the human visual system’s ability to see patterns and trends.”

Infographic videos are excellent platforms to demonstrate information flows, data, concepts and other ideas that would be extremely challenging or downright impossible to shoot on video.

The Creative Factor

These various hacks and techniques to produce videos or parts of longer videos with little or no footage are proven, and have always pulled me through. That said, it’s a process that requires a LOT of thinking outside the box and improvising. It tests creativity and patience to the limit. There are often seriously high levels of frustration. In other words, don’t try this at home, it will drive you nuts, to drink or both.

Call me at Total Spectrum instead. I or one of my protégés can hopefully convince you to work toward the “Perfect Scenario” video described earlier. But if not, we’ll figure out a way to make you a great video with whatever you have or can provide. It’s just how we roll.


Mark Terpening is a seasoned copywriter, videographer, video editor and reluctant IT specialist for Total Spectrum Advertising. He is also a practitioner of other Strange and Unusual Arts too numerous to mention here.

The Art of the Trade Show Video

(Or how to attract and inform visitors while keeping your booth staff sane)

In How to Effectively Deploy Your Finished Video Production, we touched upon the best practices and hardware for playing a video in a trade show booth or environment. In this article we will delve into some tips that will help make you trade show video “all it can be”. A common misconception is that any video – whether it is a short corporate promo, an installation piece, or a product knowledge clip is perfect fodder for trade show viewing.

In reality, a properly produced trade show video is really its own animal and needs to be approached as such. Elements of existing videos can certainly be incorporated into a new trade show video production, but not relied upon to do the job by themselves. Behold the Art of the Trade Show Video:

Production Quality

Any video should be in HD and crisply and professionally produced. (For tips on affordable, high-quality video production check out How to Concept and Executive Produce a Short, Effective Video Production.) Since most trade show booth video monitors tend to be on the larger side (32” and up) this is particularly important. Due to the massive proliferation of hi-quality consumer HD video and audio equipment, audiences are getting more and more sophisticated. (A properly used smartphone can shoot damn fine HD video in the right lighting and conditions.) People are accustomed to viewing hi-quality video pretty much everywhere – your booth should be no exception.

Length and Structure

Since trade show booth videos are typically played/repeated all day throughout the show a 1-2 minute video generally doesn’t make sense – as it will pretty much drive everyone nuts in short order – show attendees and booth staff alike. Most attendees are at a show to learn more about a service or product and are willing to spend some time doing so.

Conversely, a 15 minute training video is much too long and detailed for trade show use. In our experience, 5 to7 minutes is the sweet spot for the majority of booth/product applications.

Much like trade show videos, infomercials are often repeated over and over so they are worth examining. Let’s briefly look at the structure of a typical infomercial. Usually an infomercial begins with an upbeat (or dramatic) “commercial” that hits all the key points of the product or service. Then it stretches out with more detailed information and demonstrations. Then the cycle repeats: commercial – detailed information, commercial – detailed information, etc. Maybe there are a few customer testimonials thrown in randomly as well.

The point is that the style and pace of infomercials changes up frequently – instead of repeating one video segment over and over until it becomes a droning buzz in the background that people tune out…or turn off.

An Example:

Let’s say you sell racing go-carts and want to produce a trade show video. The first minute or two can be a voiced-over “commercial” and quickly focus on the company and models of go-carts provided. Then cut to a minute or two of racing shots of the go-carts set to music – with no narration or voice over – just music. Next, have the voice over return and cover go-cart features and benefits. Then cut to a customer testimonial or two…then cut to more go-carts in action set to music.

You get the idea. The main point is to change up the style and pace to better hold viewer interest. Of course, in the “music video” portions you can also fly-in copy points or logos as needed to help reinforce your message or brand. More about that next…

Music Video vs. Voice Over Video

Trade shows can often be very noisy environments, and narration from video playback in a booth can add to uncomfortable noise levels and/or not be heard properly.

If trade shows or conferences where you exhibit tend to get really loud, you may want to consider ditching the voice over format in favor of a music video format where footage, text and graphics are cut to an instrumental music track appropriate to your industry and company.

The challenge when taking the music video route is communicating your message, business philosophy or brand with on-screen text and graphics. The up-side is that if you do it right and your visual content and text points are solid, a music video is a powerful and effective way to communicate – even without the benefit of a voice over.

On the other hand, if your booth is large and perhaps has a separate conference area for meetings with interested attendees, a video with a voice over is preferred as it is a more “formal” sales setting. In a perfect scenario, your prospect would have been drawn in by the informative and fast moving music video playing at the front of the booth!

Wrap-Up

In conclusion, here are the key elements of a winning trade show video:

  • 5-7 minutes in length
  • Well-paced, infomercial format (see above)
  • Compelling music track and/or
  • Engaging voice over
  • Solid on-screen copy points

One more tip and we are wrapped-up. A good test for almost any trade show video is as follows: turn the sound all the way down and watch the video. Does it still communicate effectively, a little bit or at all? If it still communicates without sound, it’s a winner for sure.

If you are looking for “winning” trade show videos, Total Spectrum is your production company. We have the experience, equipment and staff to make it happen in time for your next trade show. Contact us at 714.637.3600 and speak to one of our experts today.
How to Effectively Deploy Your Finished Video Production (Or what the heck do I do with it now?)

Introduction: Now What?

OK, so you have completed your short, attention-grabbing 1 to 3 minute video production as outlined in How to Concept and Executive Produce a Short, Effective Video Production. What are the next steps? In this short article we will review various video formats, applications and tips on how to maximize the impact of your video.

Video Formats

As we mentioned in the above-referenced article, you should have requested that your finished video be delivered in different formats for different uses and playback systems. We recommend:

  • DVD (Standard or Blu-Ray)
  • High Definition (HD) .mp4 Video (for Mac/PC)
  • High Definition (HD) Windows Media File (Generally for PC)

Let’s briefly examine each format:

DVD (Standard and Blu-Ray)

For years DVDs were the preferred method of delivery and dissemination of marketing video content, as they were a vast improvement over VHS tapes and were the state-of-the-art in the pre-YouTube era. Although their use is tapering off in the marketing world they are still commonly used in mailers and in connection with TV commercials such as spots for reverse mortgage companies (“Call Now for Our Free DVD”).

A quick technical overview: pre-or non-Blu-Ray DVDs are in Standard Definition (SD) as opposed to High Definition (HD). The native dimensions of an SD DVD “picture” are 720 x 480 pixels. Those pixels are enlarged depending on the size of the TV screen. If you play an SD DVD on a really large screen, it will “pixelate” which means the pixels will become noticeable and elements in the picture will appear “jagged” and not look so hot.

Blu-Ray DVD on the other hand is a High Definition (HD) format with native dimensions of 1920 x 1080 pixels – which is a heck of a lot larger than the 720 x 480 SD video format. Since there is a lot more to “work with” in HD, it looks far superior and sharper to SD on any size screen – large or small. Bitrate plays a big part as well. An SD DVD bitrate is usually around 6,000 – 9,000kbps, where a Blu-Ray DVD is 12,000 – 18,000kbps and up.

There is more to it, but those are the basics of DVD formats and resolution. The moral of this DVD technology tangent: Keep in mind the possible end uses of your DVD. If it’s going to be played on small to mid-sized screens, then an SD DVD is just fine. If it’s going to be played on a large screen at a big conference, then it’s Blu-Ray all the way!

High Definition (HD) .mp4 Video

In today’s video world, the .mp4 is becoming the most-used and flexible video format. It’s compatible with most media players in Macs or PCs, as well as iPad and other tablets. Some older Windows players won’t play mp4s, but that situation can often be remedied with a quick player or codec update. The file sizes are reasonable and good for uploads, and the picture quality is great. (…If properly rendered, of course..)

High Definition (HD) Windows Media File (.wmv)

Windows Media Files (.wmv) are similar to mp4 video files in that the file sizes and picture quality are roughly the same. The main difference is that .wmv files are the the PC “standard”, and will play on any PC pretty much flawlessly. Very reliable. On the flip side, sometimes Mac video players won’t play .wmv files or require an update or a plug-in.

So really, the whole point of multi-format delivery from your video producer is to cover your Mac, PC and DVD bases – which will give you the options you need for any playback scenario.

Video Uploads: Where and Why

A question that often comes up is: What file do I upload to YouTube or similar sites? The answer: either the HD mp4 or .wmv file described above – it doesn’t really matter as long as it’s in HD. You want to upload the highest quality video you can for optimum playback quality. This is especially important if end users decide to stream your video at full screen size through a large TV or computer monitor.

Please don’t try to upload the files on a DVD. It won’t work. (We actually had a client who tried that, but that’s another story.)

Another hot question: What’s the best place to upload and host my video for a website embed? That’s a bit more involved, so here goes:

YouTube

Everybody knows about YouTube…as far as video sharing websites are concerned, they are at the top of the heap – size and volume-wise. But a key advantage of YouTube may not be so obvious: In addition to hosting videos, YouTube technically is the second largest search engine on the planet next to Google, who guess what? Happens to own YouTube. So, with rare exception, your video should probably be on YouTube, and maybe a couple of other sites as well.

The down side of YouTube is that there is a LOT of advertising, pop-ups, competing videos and general clutter. It’s kind of the New York Times Square of video sites in that regard.

Vimeo

Vimeo is a somewhat different animal as users can purchase different levels of “Premium” and “PRO” customization with fewer or no advertisements or pop-ups – thus keeping the competition from intruding on your channel or page.
Vimeo PRO accounts for business and commercial use allow additional storage, more plays, advanced analytics, third party video player support and more. Everyone except “small scale independent production companies, non-profits, and artists who want to use the Vimeo Service to showcase or promote their own creative works” must become Vimeo PRO subscribers in order to upload commercial videos or use Vimeo for their business’s video hosting needs. Sometime you just gotta pay…

Wistia

Wistia is similar to Vimeo and is often used to host training and content libraries. Wistia has also integrated closed captioning, transcripts and other tools that are growing increasingly important in the video marketing world. The Wistia interface allows for complete customization of the video player, post and pre-roll behavior of the video, and an API which allows users to make customizations to their videos, accounts, and statistics on the back end.

There are numerous other up and coming video hosting sites out there. Check several of them out to determine what will work best for your company or organization. Most of the time, we prefer YouTube for general videos and Vimeo for our website embed applications.

Descriptions and Tagging

Regardless of the where you upload your video program, it’s important that people can search for and find your work. So take advantage of the video description box and write a short description of the video. Make sure to include your website URL and contact information as well. A hyperlink to your website will be automatically created in YouTube if written in the http://www.yourcompany.com protocol.

In the admin section for each video there is also a box to add “Tags” or key words and phrases to allow search engines to index, locate and list your video in search results. Tags should include the company name, name/model number/title of the product or service, product benefits, city, county, state, etc.

eBlast Your Video

A great way crank up some video views on YouTube or other video sharing sites is to send an eBlast promoting or introducing the video to your customer email database. eBlasts should be designed with a big “Play” button prominently displayed so potential viewers can click directly through and view – unless you require a form to be filled out and submitted before accessing video content.

Trade Shows

Every company needs a video or videos playing in their trade show booth. It’s really the topic of a whole different article, but as far as format/playback is concerned there are a couple of things to consider:

The tendency is for clients to ask for a “DVD for the booth”. OK, but not always the best choice. First of all, a DVD requires hardware (a player) that has moving parts, so there is always the possibility of mechanical breakdown or failure – especially if the unit is running for days at a time. DVD’s played in laptop computers can be sketchy in general unless they are playing store-bought movie-type DVDs. This is because store-bought DVDs are “replicated” and just more reliable than one-off computer-burned “duplicated” DVDs. It’s a strange science, believe me.

A better choice: play the mp4 or .wmv version of the video on a laptop or tablet with the video file stored on a flash drive or on the computer desktop. No mechanical DVD drive to fail or stutter. Then connect the laptop or tablet to the TV monitor in the booth. Done deal.

Wrap-Up

That’s about it for this installment. As you can see, one video can be deployed and used in a number of ways to effectively promote your service, product or brand. Have questions or need help with your online video hosting? Contact Total Spectrum at 714.637.3600 and speak to one our experts. They have this stuff down.

Green Screen Tips and Techniques

Tips and Techniques to Ensure a Great Green Screen Video Production

As mentioned in our article on video production, a super-effective and flexible video production tool is green screen technology. For example, you shoot video of the host of a program against a special green or blue background that can be removed or “keyed out” in post-production and replaced with the background or backgrounds of choice. With this technique, the host can appear in multiple locations without the need for travel – thus saving thousands of dollars in production costs.

Probably the earliest and most common use of green screen or “chroma key” technology is TV weather reports – where meteorologists stand in front CGI backgrounds gesturing wildly at the latest weather patterns.

In the past, the chroma key or green screen technology tended to often look cheesy and rough around the edges, but with modern keying technology, equipment and techniques it can look very crisp and incredibly realistic – adding amazing dimensions and flexibility to your project. The kicker is that it can now be accomplished within a modest budget.

Basic Tips and Techniques

Although the results can be fantastic, there are a few things that are critical to a green screen shoot that can truly make or break the production:

The Green Screen or Wall

Most green screen video shoots utilize a wall or multiple walls painted with a special bright green reflective paint developed specifically for the purpose. It’s worth repeating: this isn’t Home Depot or Dunn & Edwards paint, but special stuff that’s formulated to provide the high luminance values and color saturation required for keying effects. It’s also generally about 80 to 100 bucks per gallon.

Larger, more elaborate green screen studios often have green floors, as well as walls with curved corners for head-to-toe or wide, seamless shots. That’s a lot of expensive green paint. Portable green screens with special green cloth that stretched over a frame are another option for location shoots – say at a convention or event where you wish to shoot quick customer testimonials and select industry-appropriate backgrounds for your subjects later in post-production.

The main thing to remember is that whatever type of green screen is used, it needs to be smooth, even and properly lit, which brings us to our next topic…

Lighting

Equally important as the green wall or screen itself it the lighting applied to it. It needs to be sufficient, even and smooth across the entire green wall or screen. No shadows or dark areas. No area should be brighter or blown out with excessive light. You should see nothing but that weird green – nice and consistent. To best dial-in the light on the wall or screen, studios use dedicated lighting systems just for the green screens. The on-camera talent is then lit separately – as humans require different types of lights and lighting.

Clothing

The idea of using an ultra-bright green as the color to “key out” and replace stems from the fact that there are very few hues in the natural world that come close to it. It’s also about as far away from human flesh tones as a color can get, so it’s a good color to use. That said, if an actor wears a green shirt in front of a green screen it can key out or partially key out…even if it’s a much different shade of green.

This means the green shirt would disappear or partially disappear – and would be replaced by whatever background that is being used. Not good, to say the least.

Shadows

If the on-camera talent or anything else in the shot casts a shadow on the green screen, you also have trouble. The shadow technically changes the color of that part of the green screen or wall. This means the area with shadows won’t key out properly or will be very difficult to key out properly. The remedy? Move the on-camera talent farther away from the wall to eliminate the shadow. Actually, it’s best to have the talent as far from the green wall a reasonably possible to eliminate the next potential problem…

Spill

In addition to eliminating shadows, keeping the on-camera talent a good 8-10 feet or more from the green wall eliminates “spill”, or unwanted reflected green light from the wall or screen. That bright green wall reflects green like crazy and that wild green light can get everywhere. If on-camera talent is too close, expect a green hue on the tops of shoulders, or even on the sides of faces. It can tint blonde or light hair green. If a person is wearing glasses, the sides of the frames can catch and reflect a bit of green and also cause problems.

Incorporating Props

If you are going for a realistic location look, there are a couple of easy and cool ways to enhance the shot. Let’s say the planned background shot is live footage of a beach or resort shot from a balcony. The on-camera talent shot in front of the green screen will be laid over that footage. To increase realism, include an actual table, chair, plant or other prop in the talent’s green screen shot. That way the foreground is completely “real” and only the background is “faked”. Add a fan blowing lightly off screen to simulate a bit of outdoor breeze through the set and you have nailed it – the VAST majority of viewers will think it was shot on location.

That’s about it for this installment. In today’s marketing world, “content is king” and green screen productions are a great way to add interesting, compelling content to your online presence. Additionally, if you want better communication with your customers, investors, regulators, vendors and even the press, let us show you how green screen productions can help you achieve these goals in a cost effective manner. Just call Total Spectrum at 714.637.3600.

How to Concept and Executive Produce a Short, Effective Video Production

(Or everything you need to know about video production but don’t know how to ask)


We all know that short, attention-grabbing 1 to 3 minute video productions can be extremely valuable tools in today’s marketing realm, so this article isn’t about the need for video. We are going to cut right to the chase and cover the video production process from nose to tail – so when you do decide to produce a custom video (and you will, trust me) you will know exactly how to proceed and what to expect.

For reference, here is a link to a sample video to give you a baseline of what will be covered in this article: (Add link to Ketema or Spec Seals video)


How do you start?

This is often the biggest stumbling block and it’s the first step. It’s what seems to mystify the most. So where to begin? The first step before approaching a production company or agency for a proposal is to determine how long a video you need, and the range of your budget. Attention spans are getting shorter, so brevity is paramount. If it’s a complicated subject, think of producing multiple short video “modules” instead of a 15 minute snooze-fest.

As far as budget is concerned, prices from production companies vary wildly, but plan on spending at least $3,000 to $5,000 for a quality finished product in HD. Three finished minutes for $5,000 is a good rule of thumb, depending on location and number of shoot days.

Next, find and bookmark a few videos on YouTube or Vimeo that you like or would like to emulate. They don’t even have to be related to your industry. Then write up a detailed outline of what topics you would like to cover – keeping in mind more than 3-5 major topics or points in a short video becomes an unwieldy mess.

With the length, budget, style and topics determined you are armed with a solid initial vision that will help get you a solid custom video production proposal.


The Production Process

“What’s involved, and how long will it take?” is the next big question. Let’s break it down:


The Script

Generally, the video production people will take the outline you provided and flesh it out into a script for the voice over or on-camera talent. The script will most likely go back and forth a couple of times for approvals, revisions or tweaks. From there the script gets recorded by a professional narrator or on-camera host.

Note: It’s very important to really nail down the exact script verbiage, because it gets expensive to make changes after everything has been recorded and edited. Trust us on this; it’s pure wisdom.


The Shoot

Unless it is a complete 2D or 3D graphics production, there needs to be “video for the video”. Most short marketing or company overview videos are shot on location over the course of 1-2 days at a corporate office, plant, construction site or wherever the desired activity is taking place. It’s always good to get a few shots of every job or process for plenty of variety. Wide establishing shots of the offices, lobbies or facilities are always a must.

A super-effective and flexible video production tool is green screen technology, where you can have the host of a video appear in multiple locations without the need for travel. With modern keying technology, equipment and techniques it can look very crisp and realistic, and can add another dimension to your project.


Editing

So you have your script written, your narration recorded and your raw footage in the can…it’s editing time, people! There are two approaches: Let the video editor take all the assets and come up with a first cut for your review and revision, or sit with him or her the whole time.


Unless it is very technical subject matter I strongly discourage the latter approach as it invariably takes way more time and having someone sit there often drives the editor nuts. Just the way it is. Some editors may want you to hold their hand the whole time, but that’s not who you need. A professional should drive the process at this point, with input from the producer as needed. Like the script, there will be couple of rounds of back and forth, and then it’s a done deal!


Delivery and Formats

Finished videos should be delivered in a few different formats. First and foremost, an full-resolution HD mp4 file that can be used for both uploads to YouTube and played from a computer connected to a large screen TV; an HD Windows Media version for older PC media players that don’t play .mp4s and a physical DVD – either standard or Blu-Ray. 


Time Frames

Video production time frames vary depending on scheduling, availability, script and video draft approvals and a number of other variables – some often unseen. That said, in a reasonable world the whole process should take about a month. Basically, a week each for scripting, shooting, editing and revisions/approval is a good rule of thumb.

Naturally the timeframe could be compressed, but that can often result in higher fees. Plan on a month if you can and help keep everyone involved sane.


Every project is different, but these basics apply to the vast majority of short video productions. If you need a proposal for a project or need more information about any type of video production, contact Total Spectrum at 714.637.3600 and ask for Mark. (He is hell on wheels when he is half-drunk at the editing bay.)